How to Add Google Search Console to Shopify (2026)
Add Google Search Console to Shopify: create a Domain property, verify with a DNS TXT record (or HTML tag), then submit the Shopify sitemap.

On this page
To add Google Search Console to Shopify, open Search Console, add a Domain property for yourdomain.com, copy the TXT record Google gives you, add it in your domain's DNS (in Shopify under Settings > Domains if Shopify manages the domain), click Verify, then submit https://yourdomain.com/sitemap.xml in Sitemaps.
Time required: 15 to 20 minutes, plus a short wait for DNS to update
What you'll need:
- A Shopify store on your own domain
- A Google account (ideally a business one you will keep)
- Login to where your domain DNS is managed (Shopify, GoDaddy, Hostinger, Cloudflare and so on)
Shopify creates the sitemap and robots.txt for you, so there is no plugin to install. For what each report means once data arrives, see Google Search Console reports explained.
Step 1: Open Search Console and add a property
Where: search.google.com/search-console > Add property
- Sign in at Google Search Console with the Google account the business will keep.
- Click the property menu (top left) and choose Add property.
- Choose Domain and type
yourdomain.comwithout https or www.
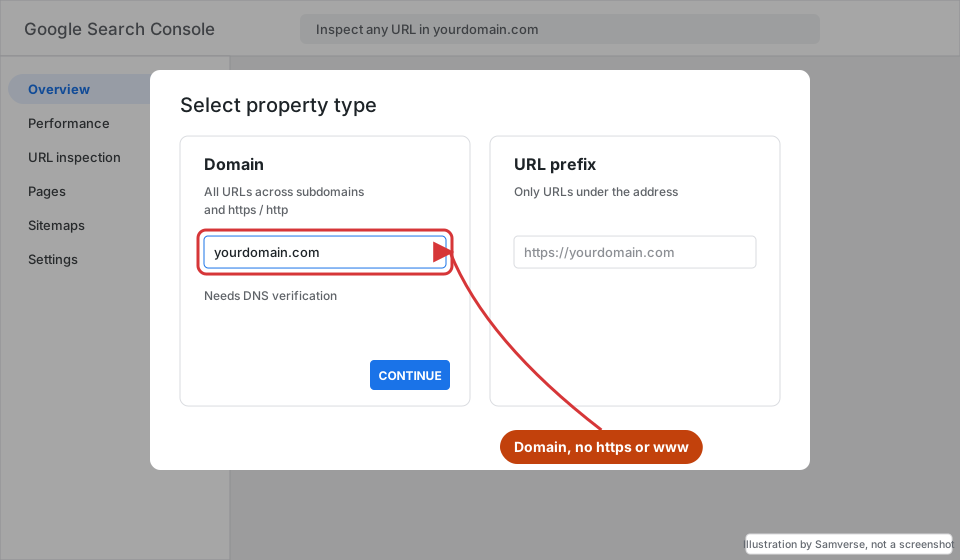
A Domain property needs DNS access. If you cannot edit DNS, use URL prefix instead and verify with the HTML tag in Step 3.
Step 2: Add the TXT record to your DNS
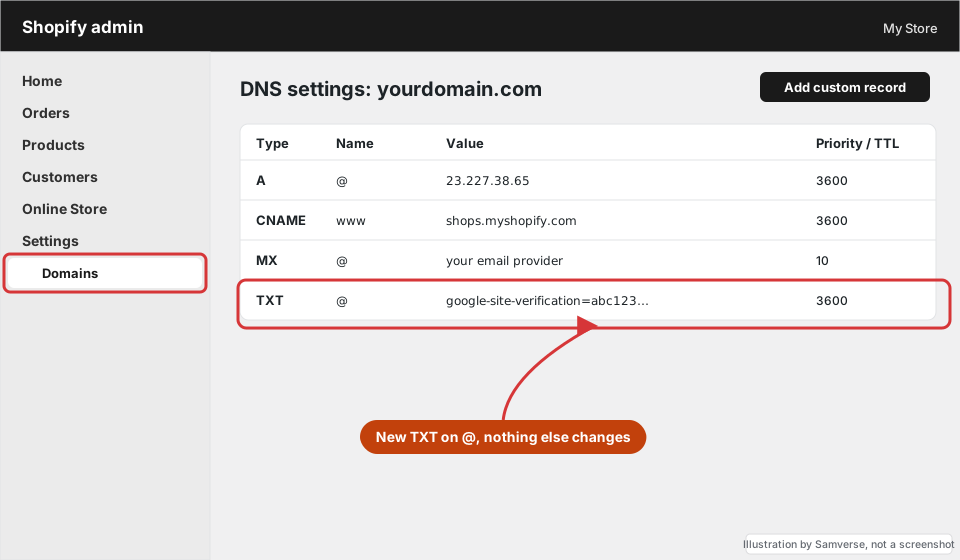
Where: Shopify admin > Settings > Domains > your domain > DNS settings (or your registrar's DNS page)
- Copy the TXT value Google shows. It starts with
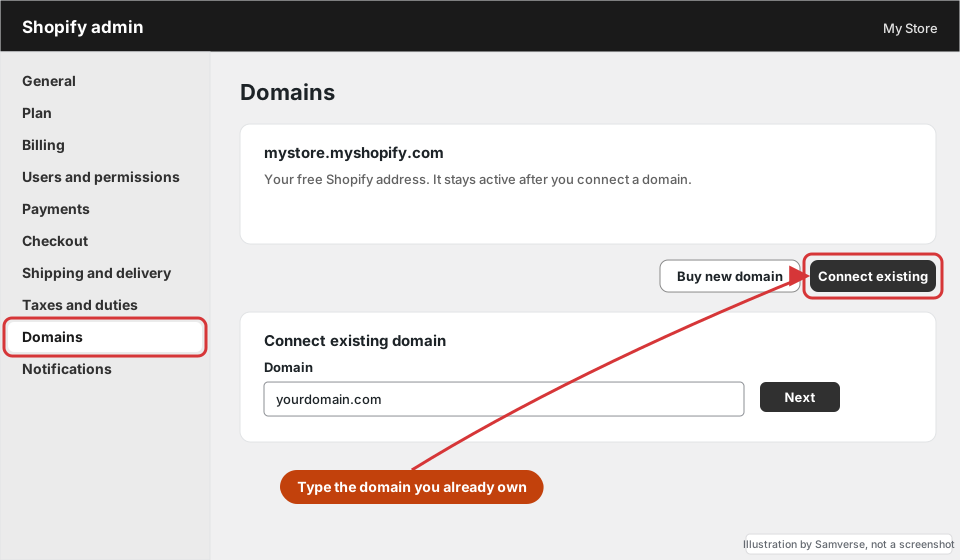
google-site-verification=. - If you bought the domain through Shopify, go to Settings > Domains, open the domain, then DNS settings > Add custom record > TXT. Otherwise open the DNS page at your registrar or Cloudflare.
- Set name/host to
@and paste the value. Save. Do not change any other records.
Step 3: Verify (or use the HTML tag method)
Back in Search Console click Verify. If it fails, wait 15 to 60 minutes and try again. For a URL-prefix property, choose HTML tag, copy the meta tag, then in Shopify go to Online Store > Themes > ... > Edit code, open theme.liquid and paste it on a new line just after <head>. Save and click Verify.
Keep the TXT record or tag in place afterwards. Removing it can make you lose verification.
Step 4: Submit the Shopify sitemap
Where: Search Console > Indexing > Sitemaps
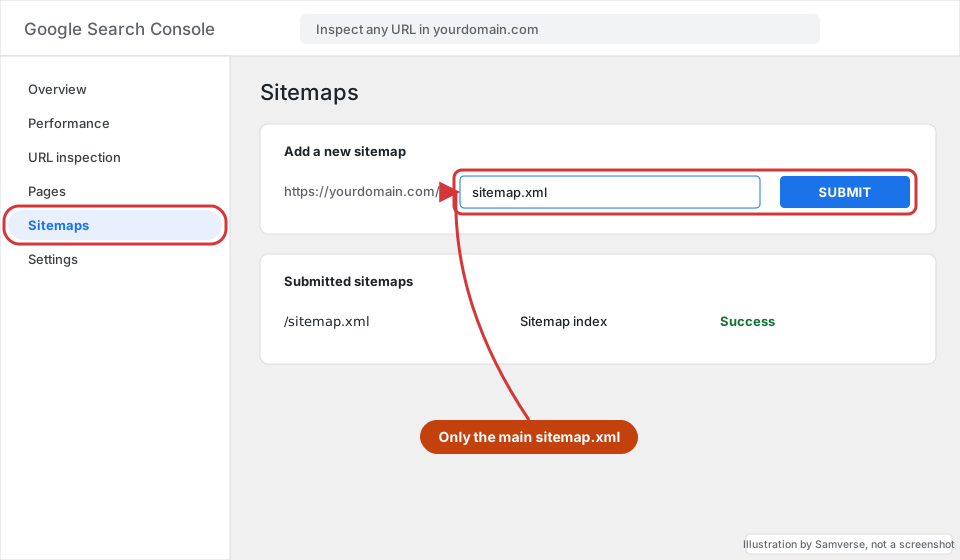
- Open Sitemaps in the left menu.
- Type
sitemap.xmlafter your domain and click Submit. - The status should read Success. Shopify's sitemap is an index that links to product, collection, page and blog sitemaps; you only submit the main one.
"Couldn't fetch" just after submitting is common and usually clears on its own; see sitemap couldn't fetch.
Step 5: Inspect your homepage and a product
Paste your homepage URL into the search bar at the top (URL Inspection). If it says the URL is not on Google, click Request indexing. Repeat for one or two main collections. There is no need to do this for every product.
Step 6: Remove the store password and add users
- If Online Store > Preferences > Password protection is still on, Google cannot crawl the store. Turn it off at launch.
- In Search Console Settings > Users and permissions, add your developer or marketer with Full rather than giving them your login.
- Link Search Console to GA4 (Admin > Product links) once analytics is set up; see adding Google Analytics to Shopify.
Troubleshooting
- Verification failed: the TXT record is on the wrong name (for example
www), has extra quotes, or DNS is managed somewhere else (check the nameservers). - Many "Duplicate without user-selected canonical" or "Alternate page" rows: normal on Shopify for variant and collection-product URLs. Shopify sets canonicals; leave them.
- "Blocked by robots.txt" for /cart, /checkout, /search: expected. Shopify blocks these on purpose.
- No data after verifying: reports fill in over a few days.
FAQs
Does Shopify have a built-in Search Console integration?
No. Shopify generates the sitemap and robots.txt, but you add and verify the property in Search Console yourself, as above.
Where is my Shopify sitemap?
At https://yourdomain.com/sitemap.xml. It is created automatically and updates when you add products, collections, pages or blog posts.
Should I use a Domain or URL-prefix property for Shopify?
Domain, if you can edit DNS. It covers every version of the address. URL prefix with the HTML tag is the fallback when DNS is out of reach.
Stuck on a step?
Tell me where you got stuck and I'll reply with a plan and a fixed quote, usually within 24 hours.